
ConnectionsSecure
SSH tunnels
DBCode supports two types of tunnels for connecting to databases that aren’t directly accessible:
- SSH Tunnels: Traditional secure shell tunnels that forward traffic through an SSH server
- Command Tunnels: Local proxy processes that handle authentication and connection forwarding (e.g., Google Cloud SQL Auth Proxy, AWS SSM, kubectl port-forward)
Once configured, tunnels can be selected when creating or editing database connections.
SSH Tunnels
Section titled “SSH Tunnels”SSH tunnels create a secure, encrypted connection through an intermediate SSH server to reach your database.
Automatic Discovery
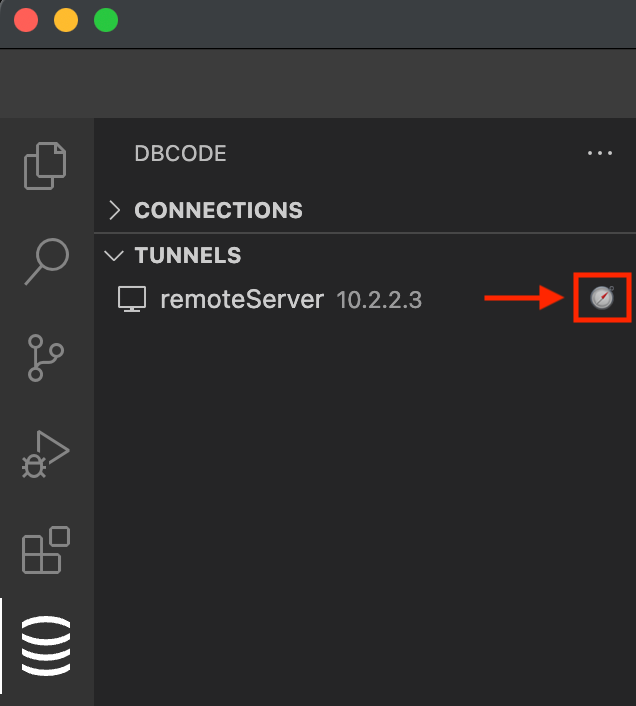
Section titled “Automatic Discovery”DBCode can automatically discover SSH tunnel configurations from your system’s SSH config file.
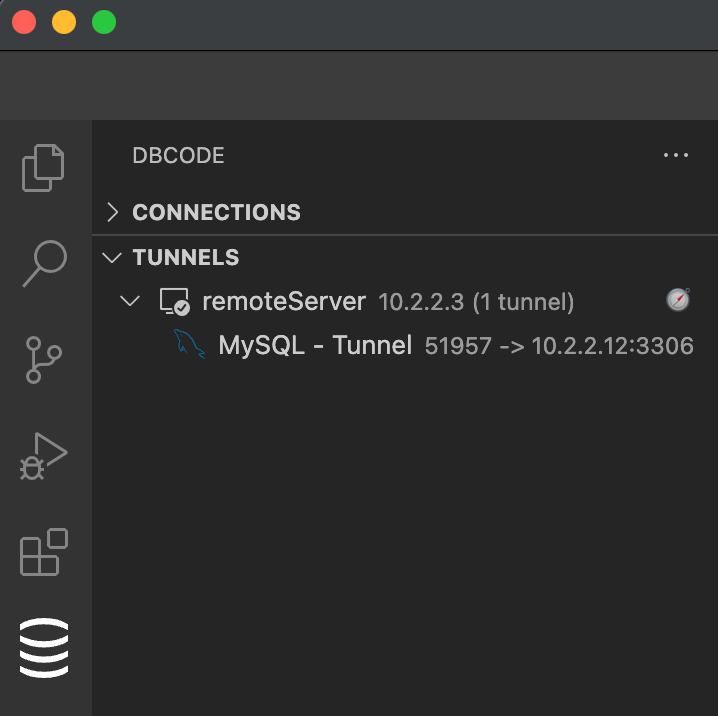
If you have existing configurations, they will be automatically detected and displayed in the Tunnels section of the DBCode Explorer with a compass icon (🧭)
Manual Configuration
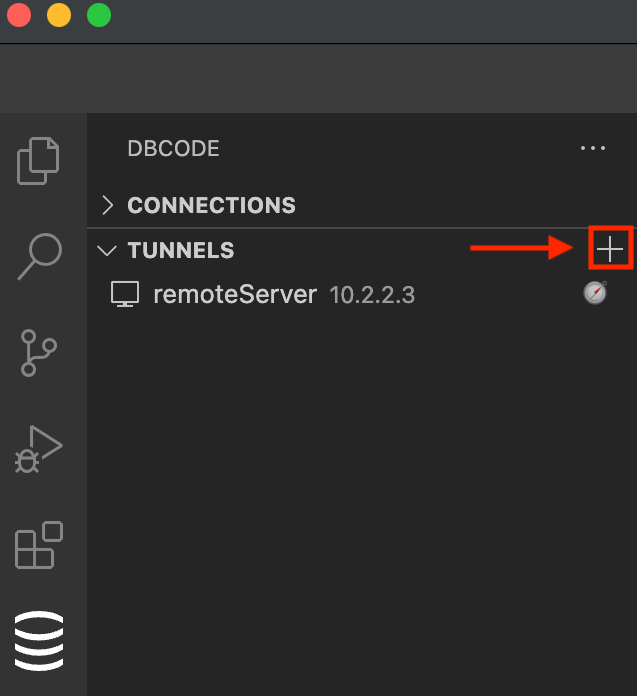
Section titled “Manual Configuration”If you prefer to manually create SSH tunnel configurations, follow the steps below. Manual configurations allow for flexible authentication options, including username/password, SSH agent, or key-based authentication.
Click the + icon in the Tunnels section of the DBCode Explorer
Configure
Section titled “Configure”- Name: Enter the name for the tunnel.
- Host: Enter the hostname or IP address of the remote server.
- Port: Specify the port to use for the SSH connection (default is usually 22).
- Username: Enter the username for the SSH connection.
- Authentication Method:
- Username/Password: Provide the password associated with the username.
- SSH Agent: Use the SSH agent running on your system to manage keys.
- Key-Based Authentication: Specify the path to your private key file, and optional password.
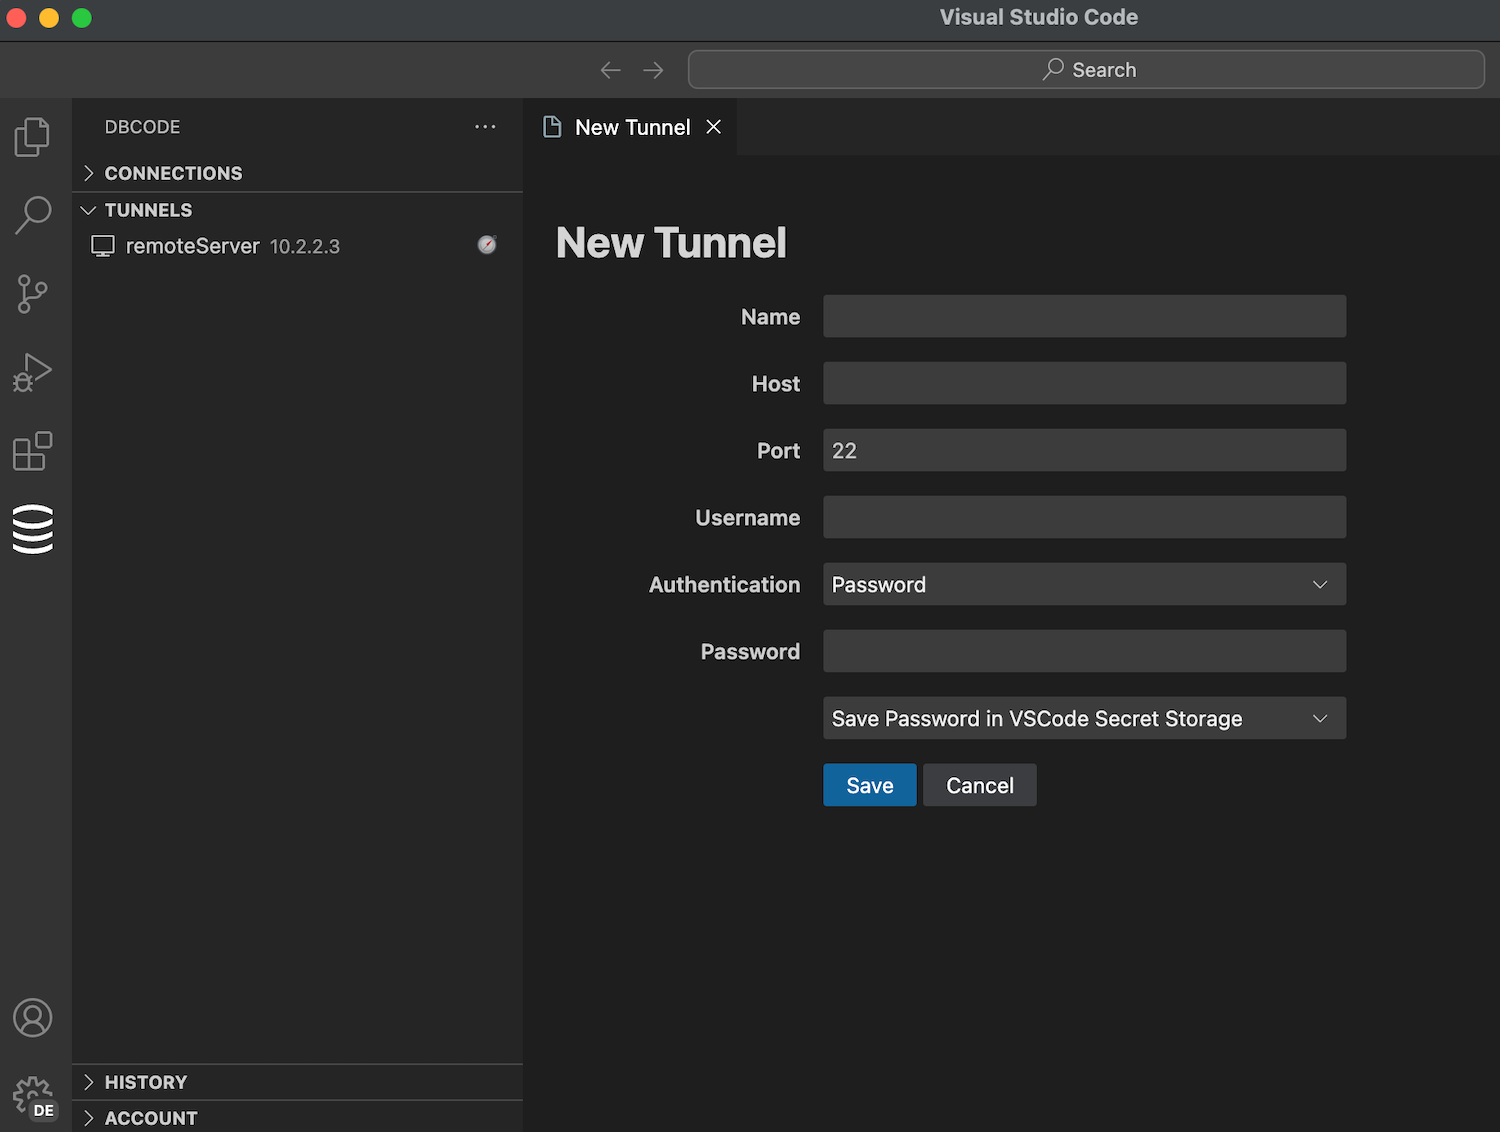
Save the newly created SSH tunnel configuration by clicking the Save button.
Command Tunnels
Section titled “Command Tunnels”Command tunnels spawn a local proxy process that handles authentication and connection forwarding. This is useful for cloud database services that provide their own authentication proxies.
Common Use Cases
Section titled “Common Use Cases”- Google Cloud SQL: Use
cloud-sql-auth-proxyfor IAM-based authentication to Cloud SQL instances - Google AlloyDB: Use
alloydb-auth-proxyfor connecting to AlloyDB with IAM authentication - AWS SSM: Use AWS Systems Manager Session Manager for secure port forwarding to RDS instances
- Kubernetes: Use
kubectl port-forwardto connect to databases running in Kubernetes clusters
Creating a Command Tunnel
Section titled “Creating a Command Tunnel”- Click the + icon in the Tunnels section of the DBCode Explorer
- Select Command as the tunnel type
- Configure the tunnel settings:
- Name: A descriptive name for the tunnel
- Preset: Select a preset for common tools or enter the details manually
- Command: The executable to run (e.g.,
cloud-sql-auth-proxy,kubectl) - Arguments: Command arguments with variable substitution support
- Ready Pattern: Optional regex pattern to detect when the proxy is ready
- Timeout: How long to wait for the proxy to become ready (default: 10 seconds)
Variable Substitution
Section titled “Variable Substitution”Arguments support the following variables that are replaced at runtime:
| Variable | Description | Example |
|---|---|---|
{localPort} | Auto-assigned local port | 54321 |
{remoteHost} | Database host from connection | my-db.example.com |
{remotePort} | Database port from connection | 5432 |
{database} | Database name from connection | mydb |
Important: Your arguments must include {localPort} so DBCode knows which port to connect to after the proxy starts. DBCode assigns an available port, substitutes it into your arguments, starts the proxy, then connects to that port.
Example Configurations
Section titled “Example Configurations”Google Cloud SQL Auth Proxy:
Command: cloud-sql-auth-proxyArguments: my-project:us-central1:my-instance --port={localPort}kubectl port-forward:
Command: kubectlArguments: port-forward svc/my-postgres {localPort}:{remotePort} -n my-namespaceAWS SSM Port Forward:
Command: awsArguments: ssm start-session --target i-1234567890abcdef0 --document-name AWS-StartPortForwardingSessionToRemoteHost --parameters host={remoteHost},portNumber={remotePort},localPortNumber={localPort}Using Tunnels
Section titled “Using Tunnels”Once you have a tunnel configured (SSH or Command), you can use it when connecting to your databases.
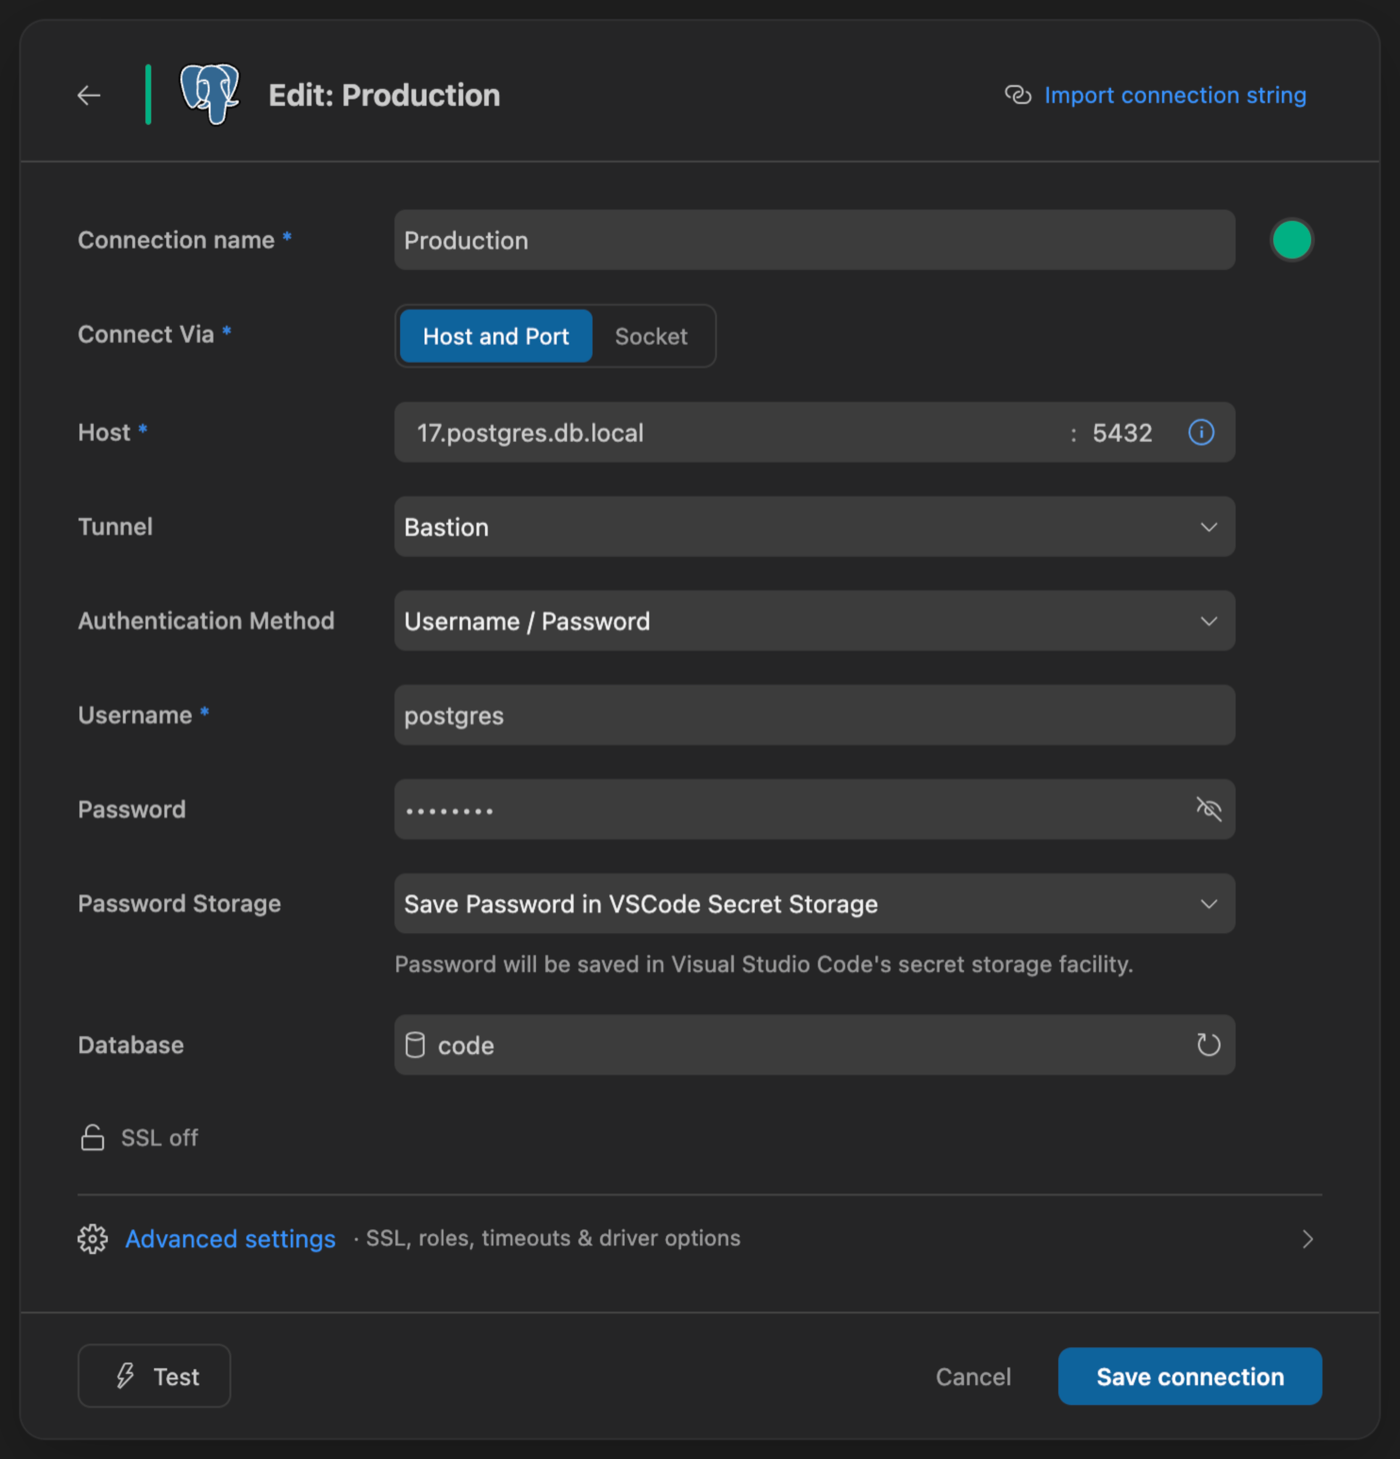
To use a tunnel for a database connection, create a new connection or edit an existing one, then select the tunnel from the Tunnel dropdown list.
Active Tunnels
Section titled “Active Tunnels”When a tunnel is in use, it will show the databases using the tunnel and the IP addresses and ports being mapped for each database.
Tunnel Logs
Section titled “Tunnel Logs”Each tunnel has its own output channel for viewing logs. This is useful for diagnosing connection issues, seeing authentication messages, or debugging command tunnel configuration.
To view tunnel logs:
- Right-click on a tunnel in the Tunnels section
- Click View Tunnel Logs
- The Output panel will open showing the tunnel’s dedicated log channel
Alternatively, click the View Logs icon in the tunnel’s inline actions.
The output channel captures stdout and stderr from the tunnel process, including:
- Connection status messages
- Authentication progress (for command tunnels like
cloud-sql-auth-proxy) - Error messages and warnings
- Port forwarding details