
Truncate Table
Truncating a table removes all rows while keeping the table structure and definitions. In many databases, truncation cannot be rolled back.
Select Database Connection
Section titled “Select Database Connection”- Open DBCode Explorer and choose the database connection that contains the table.
- Expand the connection and database that contain the table.
Locate and Select the Table
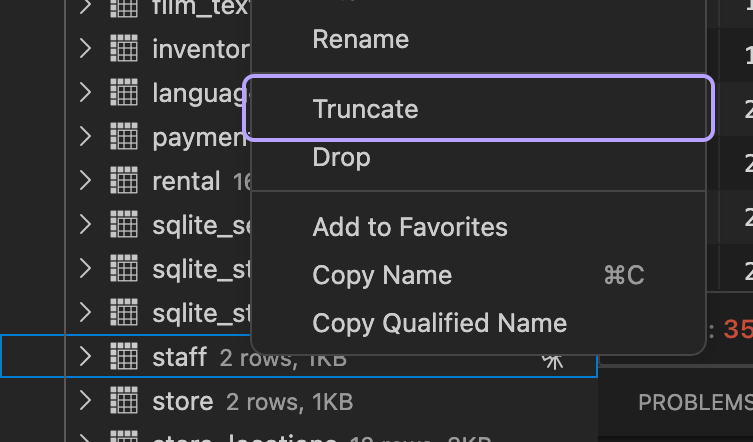
Section titled “Locate and Select the Table”- In the database tables list, find the table you need to truncate.
- Right-click the table name and choose Truncate from the context menu.
Confirm Truncation
Section titled “Confirm Truncation”- If DBCode asks for confirmation, review the table name carefully before confirming.
- To stop the operation, cancel the confirmation prompt.
Verify Success
Section titled “Verify Success”- After DBCode completes the operation, the table remains in the DBCode Explorer but its rows have been removed.