
Query Builder
The Query Builder in DBCode lets you construct SELECT queries visually. Add tables to a canvas, configure joins by dragging between columns, pick columns, set filters, and see the generated SQL update in real time. You can also use natural language to describe what you need and let AI build or modify the query for you.
Opening the Query Builder
Section titled “Opening the Query Builder”There are three ways to open the Query Builder:
- Tree icon — Click the Query Builder icon next to a database in the DB Explorer
- Right-click — Right-click a database and select Open Query Builder
- Command Palette — Run
DBCode: Open Query Builder. If no connection is in context, you’ll be prompted to select one
The Query Builder opens as a full editor tab with the connection’s schema pre-loaded.
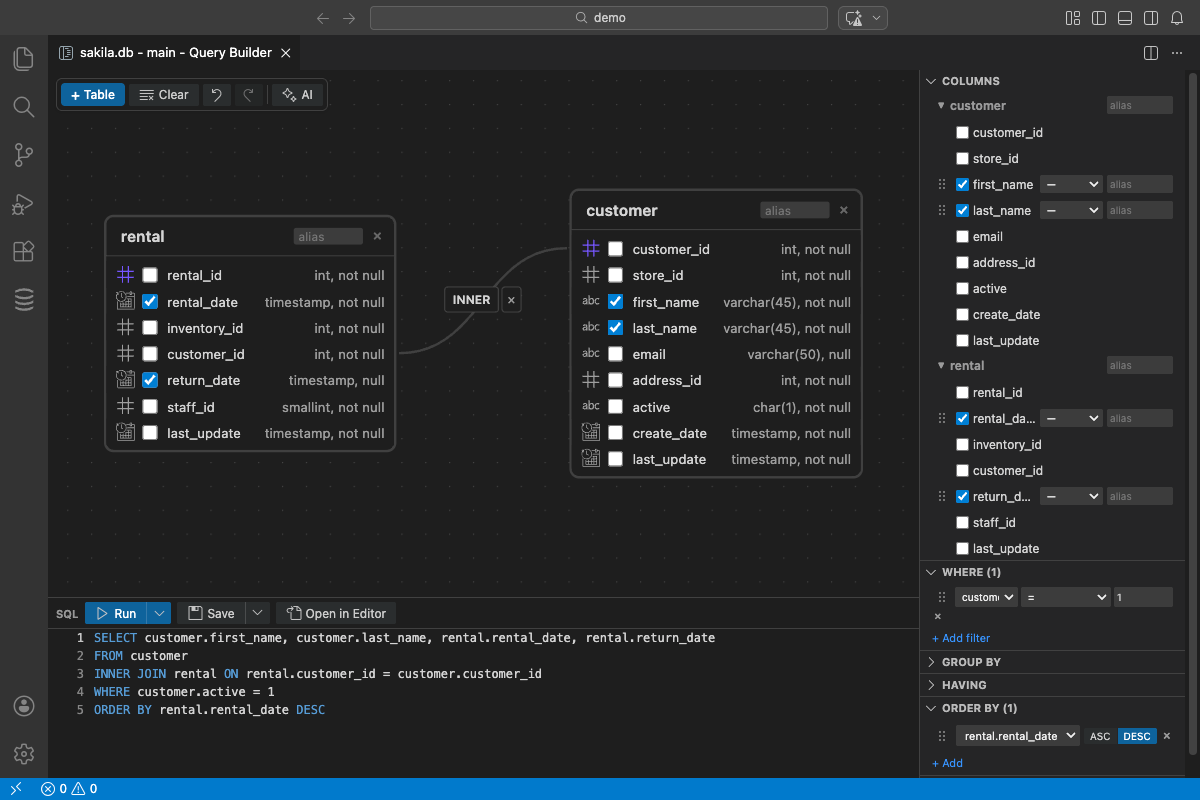
Interface Overview
Section titled “Interface Overview”The Query Builder is divided into four areas:
- Toolbar (top) — AI input bar, Run/Explain button, Save, and Open in Editor
- Canvas (left) — Drag-and-drop area where tables appear as nodes and joins appear as edges
- Config Panel (right) — Stacked sections for column selection, filters, GROUP BY, HAVING, ORDER BY, DISTINCT, and LIMIT
- SQL Preview (bottom) — Read-only, syntax-highlighted SQL generated from the current model. Updates live as you make changes. Resizable by dragging the top border
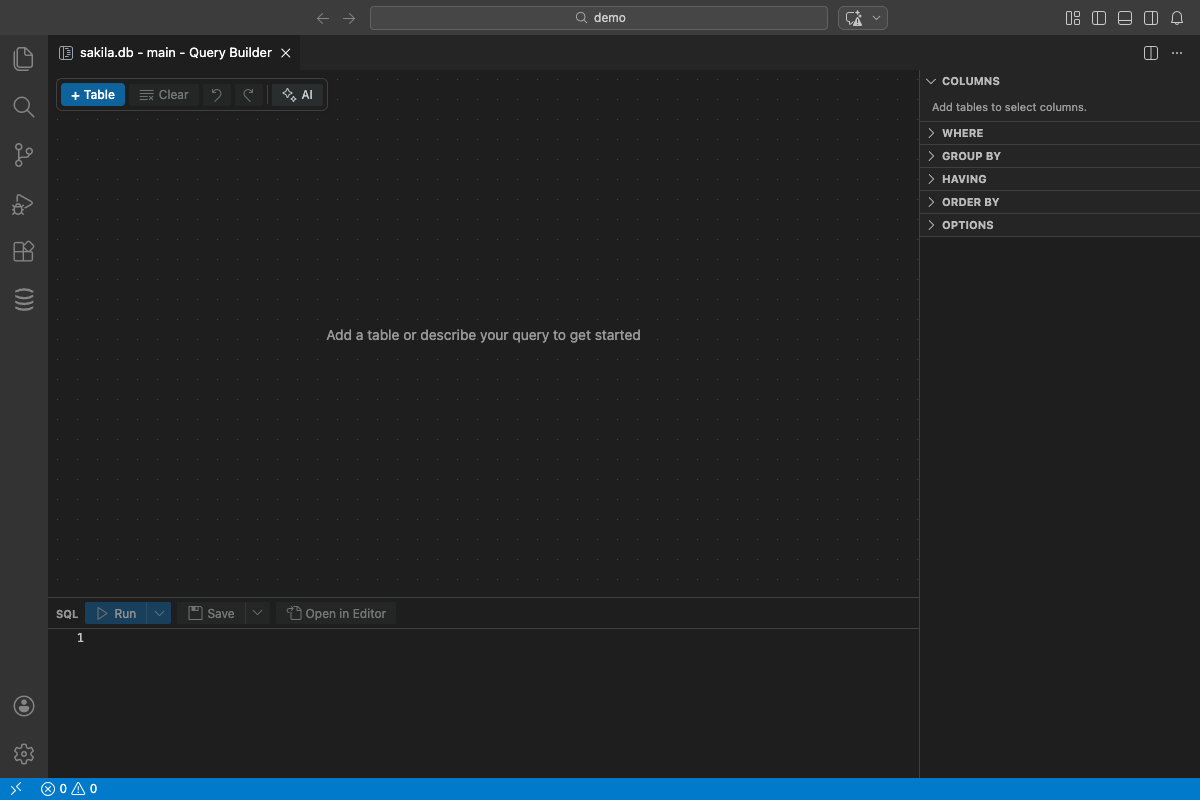
Adding Tables
Section titled “Adding Tables”- Click the Add Table button on the canvas
- Search for a table by name in the dropdown — it filters as you type
- Select a table to place it on the canvas as a node
Each table node shows the table name, its columns with data types, and primary/foreign key indicators. You can drag nodes to reposition them on the canvas.
To remove a table, select its node and press Delete or Backspace.
Selecting Columns
Section titled “Selecting Columns”Tick a column’s checkbox on its table node to add it to the SELECT clause. The Columns section in the Config Panel then lists the selected columns in order:
- Drag to reorder: grip handles on the left let you reorder selected columns, including across tables
- Alias: click the alias field to give a column an output name
- Aggregate: choose an aggregate function (COUNT, SUM, AVG, MIN, MAX) from the dropdown. When you apply an aggregate, GROUP BY is configured automatically for non-aggregated columns
Click + Add column for a searchable menu of every column. Each table has a select-all checkbox to add or remove all of its columns at once, handy for wide tables and available even when only one table is on the canvas.
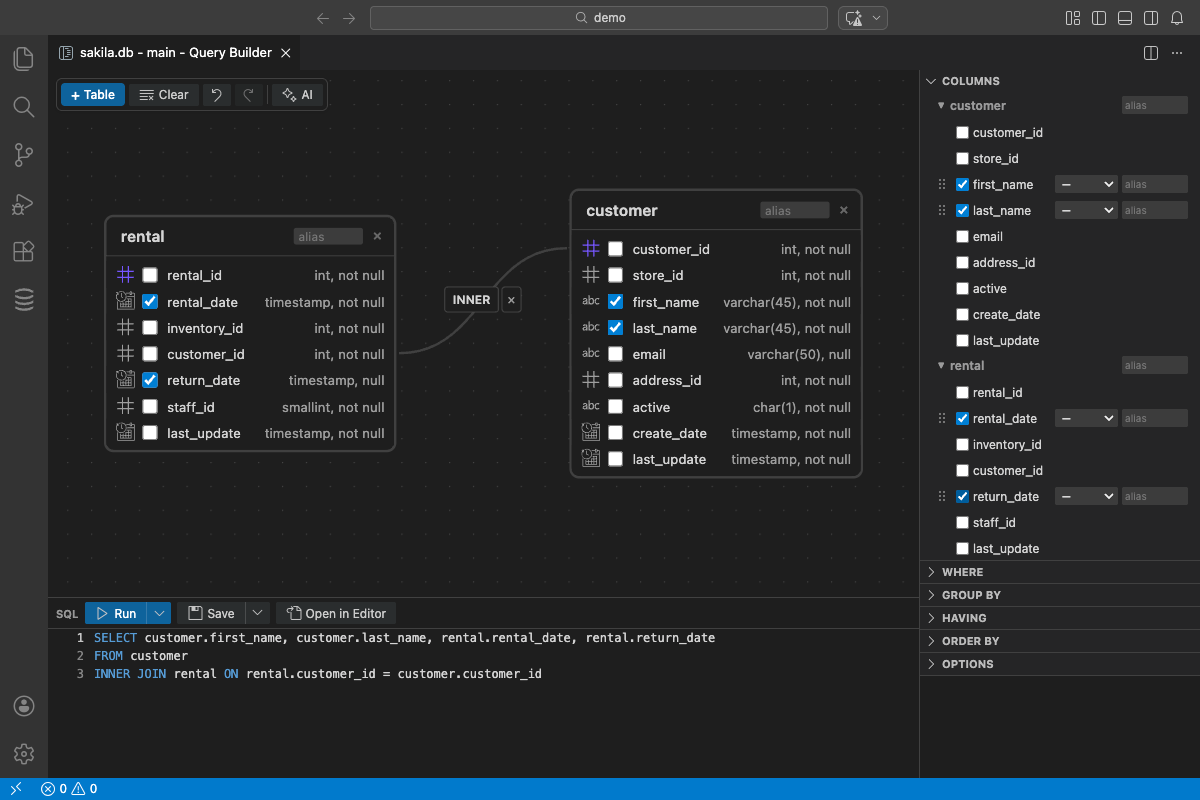
Joining Tables
Section titled “Joining Tables”When you add a second table that has a foreign key relationship with an existing table, DBCode automatically suggests a join.
To create a join manually:
- Drag from a column on one table node to a column on another
- The join appears as an edge connecting the two tables
Configuring Join Type
Section titled “Configuring Join Type”Click a join edge to see the join type picker. Hover over a type to preview its Venn diagram and description, then click to select:
- INNER JOIN — Only matching rows from both tables
- LEFT JOIN — All rows from the left table, matching rows from the right
- RIGHT JOIN — All rows from the right table, matching rows from the left
- FULL JOIN — All rows from both tables
- CROSS JOIN — Every combination of rows (Cartesian product)
To remove a join, select the edge and press Delete or Backspace.
Filtering Data
Section titled “Filtering Data”The Where section lets you build WHERE clause conditions without writing SQL:
- Click + condition
- Select a column from the dropdown
- Choose an operator:
=,!=,>,<,>=,<=,LIKE,NOT LIKE,CONTAINS,NOT CONTAINS,IN,NOT IN,IS NULL,IS NOT NULL,BETWEEN, orNOT BETWEEN - Enter a value
Values are quoted for you
Section titled “Values are quoted for you”DBCode quotes each value based on the column’s type: text is quoted ('GER'), numbers stay bare (18), and IN lists are split on commas and quoted element by element ('EU', 'US'). To pass a value through verbatim, such as a column reference or a function call like NOW(), toggle the fx button on that condition. For text comparisons, the Aa button makes the match case-insensitive by wrapping both sides in UPPER().
Combining conditions with AND/OR groups
Section titled “Combining conditions with AND/OR groups”The conditions in a group are joined by a single Match operator, AND or OR, selected at the top of the group. To mix AND and OR, nest a group: click + group to add a sub-group with its own Match operator. This produces parenthesised SQL, for example language = 'GER' AND (region = 'EU' OR region = 'US').
Drag the grip handle on any condition or group to reorder it, or to move it into or out of a group. Removing the last condition from a group removes the empty group automatically.
Grouping and Aggregation
Section titled “Grouping and Aggregation”GROUP BY
Section titled “GROUP BY”The Group By section lets you group results by one or more columns. Select columns from the dropdown to add them. When you apply aggregate functions to columns in the Columns section, non-aggregated selected columns are automatically added to GROUP BY.
HAVING
Section titled “HAVING”The Having section adds conditions that filter grouped results (like WHERE, but applied after aggregation). Add conditions with a column, operator, and value, just like the Where section.
Ordering Results
Section titled “Ordering Results”The Order By section controls result sorting:
- Click Add to add a sort column
- Select the column from the dropdown
- Toggle between ASC (ascending) and DESC (descending)
- Drag to reorder when multiple sort columns are defined
DISTINCT and LIMIT
Section titled “DISTINCT and LIMIT”- DISTINCT — Toggle the checkbox to eliminate duplicate rows
- LIMIT — Enter a number to cap the result set size
AI Assistance
Section titled “AI Assistance”The text input at the top of the toolbar accepts natural language descriptions. Type what you need and press Enter:
- Build from scratch — “Show me all customers with orders over $100 in the last 30 days”
- Modify existing — “Add a date filter for last month” or “Change to LEFT JOIN”
- Aggregate — “Show total sales by category”
The AI reads your current query model and schema, then returns an updated model. The canvas, config panel, and SQL preview all update to reflect the changes. You can undo AI changes with Ctrl+Z / Cmd+Z.
Running Queries
Section titled “Running Queries”Click the Run button (or use the dropdown for Explain / Analyze where supported by your database) to execute the generated SQL. Results appear in the standard Results Pane, just like running a query from the SQL Editor.
The Query Builder tab stays open so you can refine and re-run.
Saving to Library
Section titled “Saving to Library”Click Save to Library to save the query builder state to your Library panel:
- First save — Prompts for a name and scope (Project or Personal), then stores the full visual state (tables, joins, filters, columns, positions) along with the generated SQL
- Subsequent saves — Updates the saved item silently (no prompt)
- Save As New — Creates a copy with a new name
Opening a saved query builder from the Library restores the full visual state — table positions, joins, column selections, filters, and all configuration. If the query builder is already open, clicking the saved item reveals the existing tab instead of opening a duplicate.
Opening in Editor
Section titled “Opening in Editor”Click Open in Editor to copy the generated SQL into a new SQL Editor tab bound to the same connection. This is useful when you want to hand-edit the query or save it as a .sql file.
Supported Databases
Section titled “Supported Databases”The Query Builder works with all databases supported by DBCode. SQL generation adapts to each dialect automatically:
- Identifier quoting (double quotes, backticks, or square brackets)
- LIMIT vs TOP vs FETCH FIRST for row limiting
- Schema qualification where applicable
Undo and Redo
Section titled “Undo and Redo”All changes to the query model support undo and redo:
- Ctrl+Z / Cmd+Z — Undo
- Ctrl+Shift+Z / Cmd+Shift+Z — Redo
This includes AI-generated changes, so you can safely experiment and revert.